More cleaning devices fail during winter storage than during the entire swimming season. The causes are predictable: water left inside the pump housing freezes and cracks the casing, cables stored tightly coiled develop permanent kinks, and rubber components stored in freezing temperatures become brittle and crack on first use.
Every one of these failures is preventable with a proper winterization procedure. The process takes thirty minutes and costs nothing. Skipping it risks a repair bill that can approach the replacement cost of the unit.
Step One: Final Cleaning Run
Run the cleaner for one full cycle in clean, balanced pool water before storing it. This removes any debris or chemical residue from the filter and internal passages. A final run in balanced water also flushes the pump chamber with water at the correct pH, which neutralizes any chemical concentration that may have accumulated during the season.
Do not run the final cycle in water that has been shocked for closing. High chlorine concentrations degrade rubber seals and should not be left in contact with the cleaner’s internal components.
Step Two: Complete Drainage
Remove the cleaner from the pool and allow all water to drain from the unit. Hold the cleaner at an angle and gently shake it to encourage water to exit the pump chamber and internal passages. Water trapped inside the housing is the primary cause of freeze damage.
Remove the filter cartridge or bag and empty it completely. Rinse the filter with fresh water from a hose and allow it to dry thoroughly before reinstalling it or storing it separately. A damp filter stored in a closed unit creates an environment for mold and mildew.
Run the cleaner out of the water for ten to fifteen seconds to spin the pump impeller and expel residual water from the pump chamber. Do not run it longer than thirty seconds, as the water-lubricated shaft seal relies on water for cooling and can overheat during dry operation.
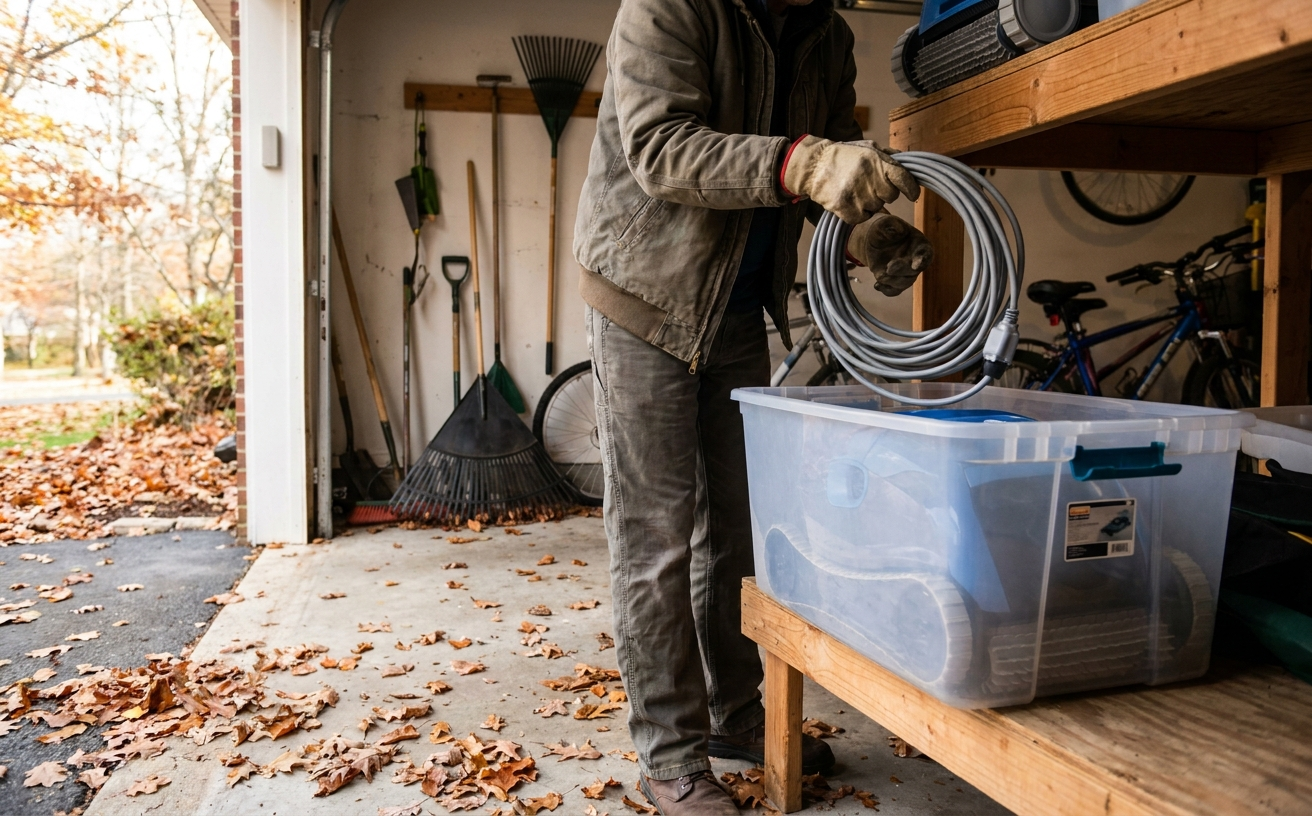
Step Three: Cable Management
Coil the cable in loose loops, avoiding tight bends or kinks. A cable coiled too tightly develops memory and will resist straightening in the spring, creating tangles during the first few uses of the new season. The minimum bend radius for most pool cleaner cables is approximately six inches.
Do not wrap the cable around the cleaner body or the power supply. Wrapping creates stress points at the entry and exit points of the cable, which are the most vulnerable areas for jacket cracking.
Inspect the entire cable length for cracks, cuts, or exposed conductors. Any damage found during the winter inspection should be repaired before storage, so the unit is ready for immediate use in the spring without the delay of ordering a replacement cable.
Step Four: Component Inspection
Check the drive tracks or wheels for wear. If the tread depth is less than half of the original depth, order replacements now so they arrive before the spring opening. Worn tracks are the most common performance complaint at the start of a new season, and the delay of ordering parts during the busy spring period can postpone the first cleaning by weeks.
Check the brushes for wear or matting. Brushes that are worn down to the hub or have bristles matted with debris should be replaced. Stiff brushes that have softened over the season may still function but will provide less aggressive scrubbing in the spring.
Check the housing for cracks, especially around the seams and the handle mounts. Cracks that develop during the season will worsen over the winter if not addressed. Small cracks can be sealed with marine-grade silicone as a temporary repair. Large cracks require housing replacement.
Step Five: Storage Location
Store the unit in a location that stays above freezing and out of direct sunlight. A garage, basement, or climate-controlled storage area is ideal. An unheated shed in a region that experiences freezing temperatures is acceptable only if the unit is completely drained and dried, because even a small amount of residual water can freeze and cause damage.
Do not store the cleaner on its side or upside down. The correct storage position is upright, in the same orientation it would be in while operating. This prevents any residual water from pooling in areas where it could cause corrosion or freeze damage.
Store the power supply indoors, away from moisture and extreme temperatures. The power supply contains electronic components that are sensitive to humidity and temperature cycling. A dry, temperature-stable location extends its life significantly.
The Thirty Minutes That Save Hundreds
Winterizing a robotic pool cleaner is not complicated. It requires no special tools, no chemicals, and no professional assistance. It requires thirty minutes of careful attention to drainage, cable management, component inspection, and proper storage location.
The payoff is a cleaner that starts on the first try in the spring, operates at full performance, and does not require an unexpected repair before the first swim of the season.
The thirty minutes you spend in the fall saves the two hundred to five hundred dollars you would spend on a freeze-damaged pump housing, a cracked cable, or a failed motor seal. It is the highest-return maintenance investment you can make.